BLOGGER TEMPLATES AND TWITTER BACKGROUNDS
Showing posts with label costuming. Show all posts

August 16, 2011

Elliptical Skirt

Aren't my titles so original lately?  I'll blame it on sleep deprivation brought on by my sewing mojo being in overdrive.

So here is the skirt that goes with the cage crinoline and petticoat from the two previous posts.  I've been a busy girl.  The skirt is made of silk taffeta and is self faced.


I'm sorry to say it may be next week before the bodice is finished.  It is the most involved piece of the ensemble with interlining and lining along with a lot of fitting before hand but, just like the crinoline, it will be well worth the effort and in the end, I will have a gown fit for 1865.

August 15, 2011

Operation Petticoat

I love muslin.  In the last two months, I have gone through 4 25yd bolts of the stuff and now I need more.  But here is what ate up my last bolt, aside from chemises and test fittings.


You can just see the outline of the crinoline peeking through the front.  The back is done in a mystery lace.  About 5 years ago, someone gave me a roll that must have had about 50 yards on it.  The lace was ruffled with the ruffle attachment and placed about 3 inches apart across the back and side back panels.  I still have plenty of ruffled lace left over.  I can't say that it is anywhere near period correct but it is what I had and it gets the job done.

August 14, 2011

Elliptical Crinoline Adventures

Here is what my table looked like while I was putting my elliptical cage crinoline together (pattern by www.trulyvictorian.com).  Normally my table is clutter free while working on a project but it looked like my sewing shelf threw up during this particular project.


It is made with a muslin bag for the bottom hoops, finished with a zig-zag stitch, which I wasn't very impressed with and do think from now on I will just fold it over like I usually do.  The actual cage was built with 1/2" hooping wire, also from Truly Victorian, pre-made bone casing (Delicious llc.), a belting kit I have had laying around for a LONG time and a whole lot of patience.  Hooping, I found, does not like to behave very well when it gets into cramped spaces.  My boyfriend had to keep coming inside from working on his truck to hold the thing up for me while I fed it under the machine.  A word of caution if working on this project alone, always let someone know where you are and what you are doing.  I got hung up a few times in the wires.  But then again, I was supposed to sew the horizontal bones on by hand :/.  I had to be smart and show it could be done by machine.

All in all, the end result was very much worth the effort.


July 28, 2011

Check Out My Transitional Hoop Outfit!


Here is a post Civil War get-up over an early bustle, otherwise known as a transitional hoop.  I apologize for the poor picture quality, it was snapped quickly with a cell phone camera in a dimly lit corner of the room.  The bustle is there but it still retains a hoop at the bottom to keep the skirts fuller.  With the invention of aniline dyes during the 19th century colors such as these would have been used and were gaining popularity, much to the dismay of some fashion conservatives.
I used Truly Victorian Patterns (www.trulyvictorian.com).  The combination is the Vest Basque, Grand Parlor Skirt and Grand Bustle.  My chemise and Corset are by Laughing Moon Mercantile (www.lafnmoon.com).  I used the Silverado corset pattern.
The outfit is made of two shades of silk dupioni.  There are plans to add single fold bias trim to the tails of the bodice as seen on the collar and cuffs.  Also there will be a 4 inch knife pleat ruffle added around the hem of the skirt.  My passamenterie is going to be rather utilitarian with this dress as I feel the colors and design speak plenty on their own.  It has been in the works for the better part of two weeks and is still not completely finished but by this weekend, all should be done.

July 15, 2011

Bust Gore Corset


Bust gore version of a Victorian Corset.  Made of two layers of coutil with a top layer of silk.  I'm currently working on faux flossing.  The adventurous sewer in me hit after the fact so the flossing stitches will be visible from the inside but hey, it's my corset, only I will see it.  

July 12, 2011

Here There Be Underwear

Completed Corset (minus lacing aglets which came in the mail today)
back view of completed corset


collar detail of chemise
hem detail of chemise

gusset detail of chemise

inside sleeve detail (Houston, we have a boo-boo) showing felled seams
crotchless bloomers anyone?


hem detail of bloomers

corset muslin


victorian busk (white) vs. elizabethan busk (wooden)

Victorian underwear project well underway!  I am waiting on some hoopsteel to come in the mail and I can begin on my crinolines.  Don't forget the bustles too!  I'm making a bustle dress too.  Pictures forthcoming when I get the project underway.  Currently I am working on a bust gore version of the corset and am planning on making a sleeveless chemise.  I feel like a sleeveless one would be more comfortable for me and may be placing the one in the pictures in my etsy shop.  Any interested parties can email me ahead of time.  One thing worth noting on the corset is the spread at the top of the busk.  Ehem, the lovely model which I have nicknamed Mrs. Wallace is larger chested than I am, therefore causing the pulling apart of the fabric.  This detail has been duly noted and I will probably be installing a hook and eye to prevent this from happening anymore.

June 23, 2011

More Underwear Pictures

chemise

pin tuck detail of chemise
farthingale before hoop steel was inserted
interior side detail of farthingale
exterior side detail of farthingale


interior back detail of corset, notice my seaming boo-boo on the tab?
grommet detail on corset


bum roll

chemise and bum roll with Victorian chemise on the right

underarm gusset

before corset was placed on dress form

wooden busk for Elizabethan corset on top with Victorian corset busk on bottom

side view

rear view

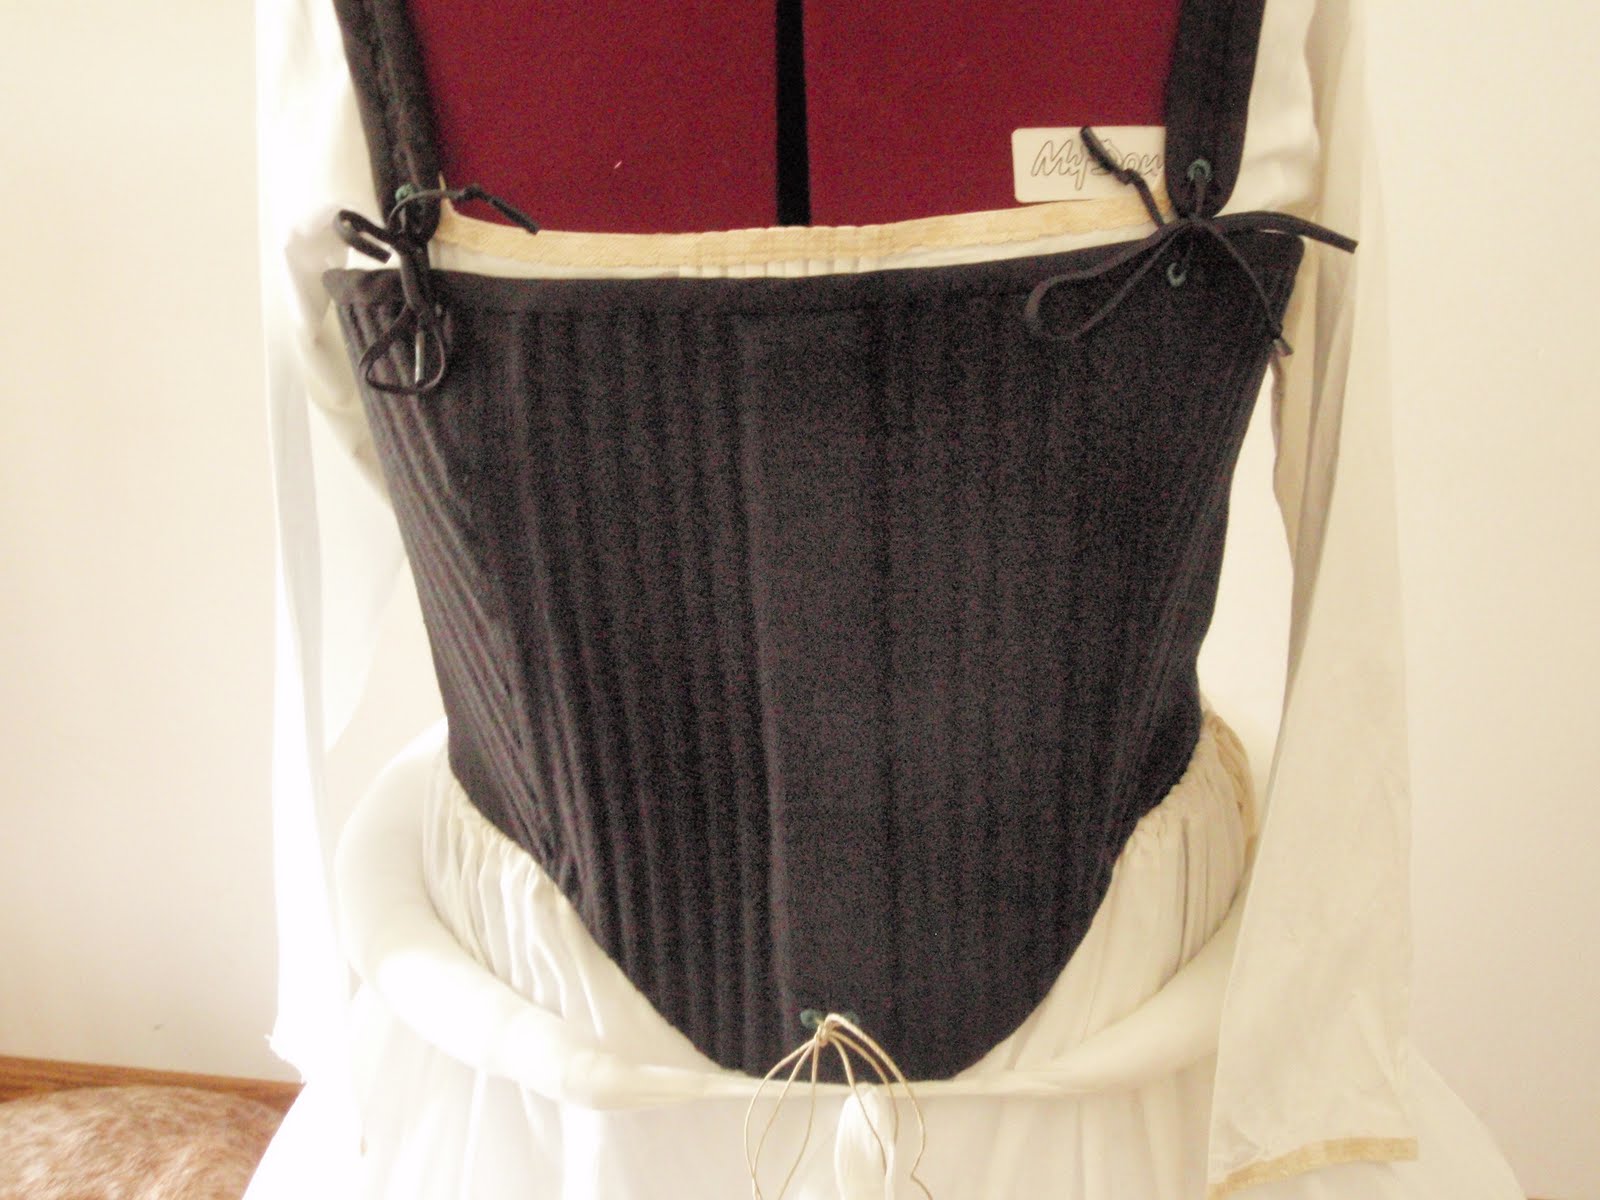
front of corset, I ran out of lacing and had to resort to hemp twine for the busk until I can get more lacing.

rear view of corset
My Elizabethan underwear ensemble is finished.  I chose not to make drawers (at this point) but have everything else; chemise, corset, bum roll and farthingale.  The chemise and bum roll were not difficult to make at all.  Anything you see made in white is muslin, thank Joann's fabric for their 50% off coupons.
I am not sure the pin tucking on the front and back is period but it was necessary to make the thing fit.  The underarm gusset was an interesting detail that I had not encountered in my sewing before now but I found that I like it and the room it affords for movement.
The farthingale was not particularly difficult to put together, it just requires a mixture of technical skill and jerry rigging to get the hoop steel put in and secured.  I skimped on the finishing crimps and used electrical tape, which you may be able to see showing through the fabric in the pictures.  The fabric was still damp from removing tailoring marks.
The corset was not difficult to make at all, contrary to popular belief it does require patience and a fair amount of handwork.  Black linen and green duck were used for the body of the corset.  Boning is done in zip ties and I used metal grommets, then finished them by hand to lend a more authentic look.  The busk is a piece of pine that I picked up for free out of a scrap pile from one of the local hardware shops.  This being my first run at a corset, I don't feel too bad about the effort but there is a lot of room for improvement on any future works.  It does not fit as snugly as I would like but that is on my list of things to keep in mind for the next one.  Yes, there will be a next one, a Victorian era corset to be specific, that will include metal boning and coutil and a real busk!
The bum roll is not placed correctly in the pictures, I was so excited to have it all finished I just kinda threw it on the dummy and started snapping.  Yesterday's post may have a better shot.

June 21, 2011

Found My Camera

Well, technically, it's my boyfriend's camera but it still snaps pictures all the same.  Anyhew, I will be posting pictures before the end of the week.  Nothing major, a couple of chemises, a set of drawers, a bum roll and a (hopefully) complete farthingale.  My coutil just came in yesterday for my corset so I plan on beginning work on that just as soon as I complete my muslin sometime this week.  I will snap a picture of the muslin as well to go along with the underwear post.  Happy sewing!

June 14, 2011

Research

I thought with the end of the semester so would I be finished with research but, I find it continues, just on a more pleasing subject -- sewing.  This morning I went to the library and checked out a few books on costuming, fitting and alterations.  One book in particular I am very excited about.  Amazon has it listed in the second edition for around $90 so I was bummed about not being able to afford it at the moment but then I got lucky this morning and found the first edition on the shelf by chance.  It is called "Fitting and Pattern Alteration: A Multi-Method Approach" by Elizabeth G. Liechty, Della N. Pottberg and Judith A. Rasband.  Normally I do not keep books I get from the library for the whole time alloted but this one I think I will so there is plenty of time to go back and page through it whenever I want.  Other titles from this morning include "The Corset" by Valerie Steele, "The Theatre Student: Costuming" by Prisk and Byers, "Period Costume for Stage and Screen: Medieval - 1500" by Jean Hunnisett and "The Cut of Women's Clothes 1600 - 1930" by Nora Waugh.  Needless to say, I cannot wait to get home and begin my research.  Thank goodness for the local library!  Ya'll have a good day, I've got some reading to do.